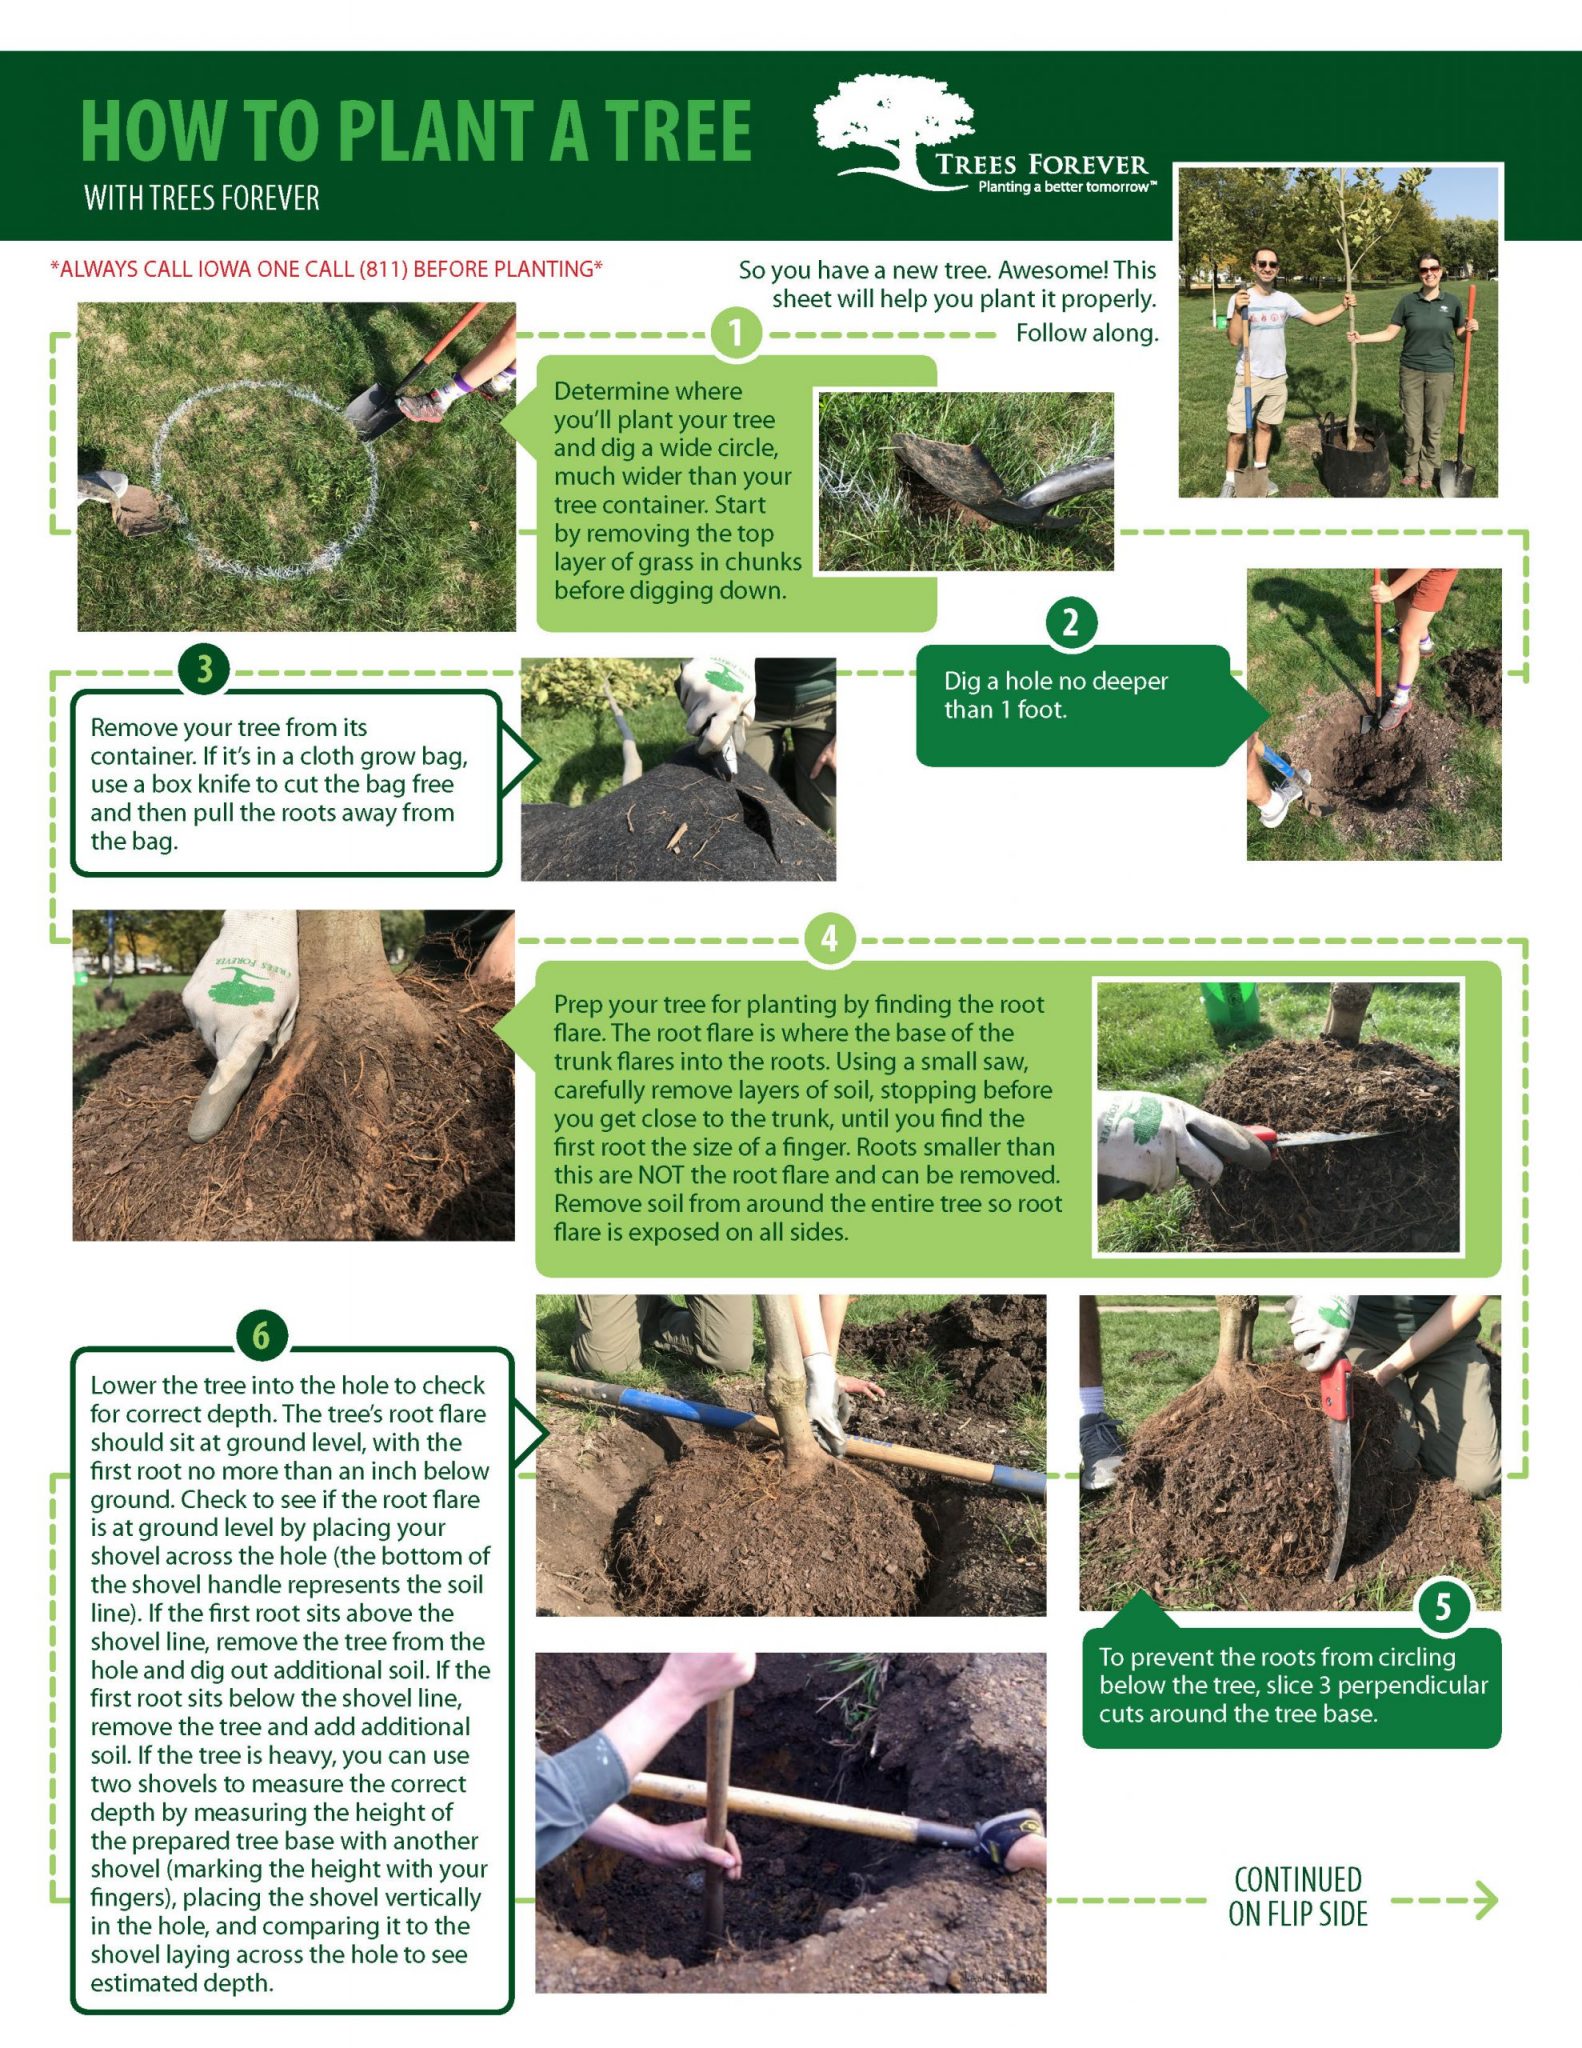
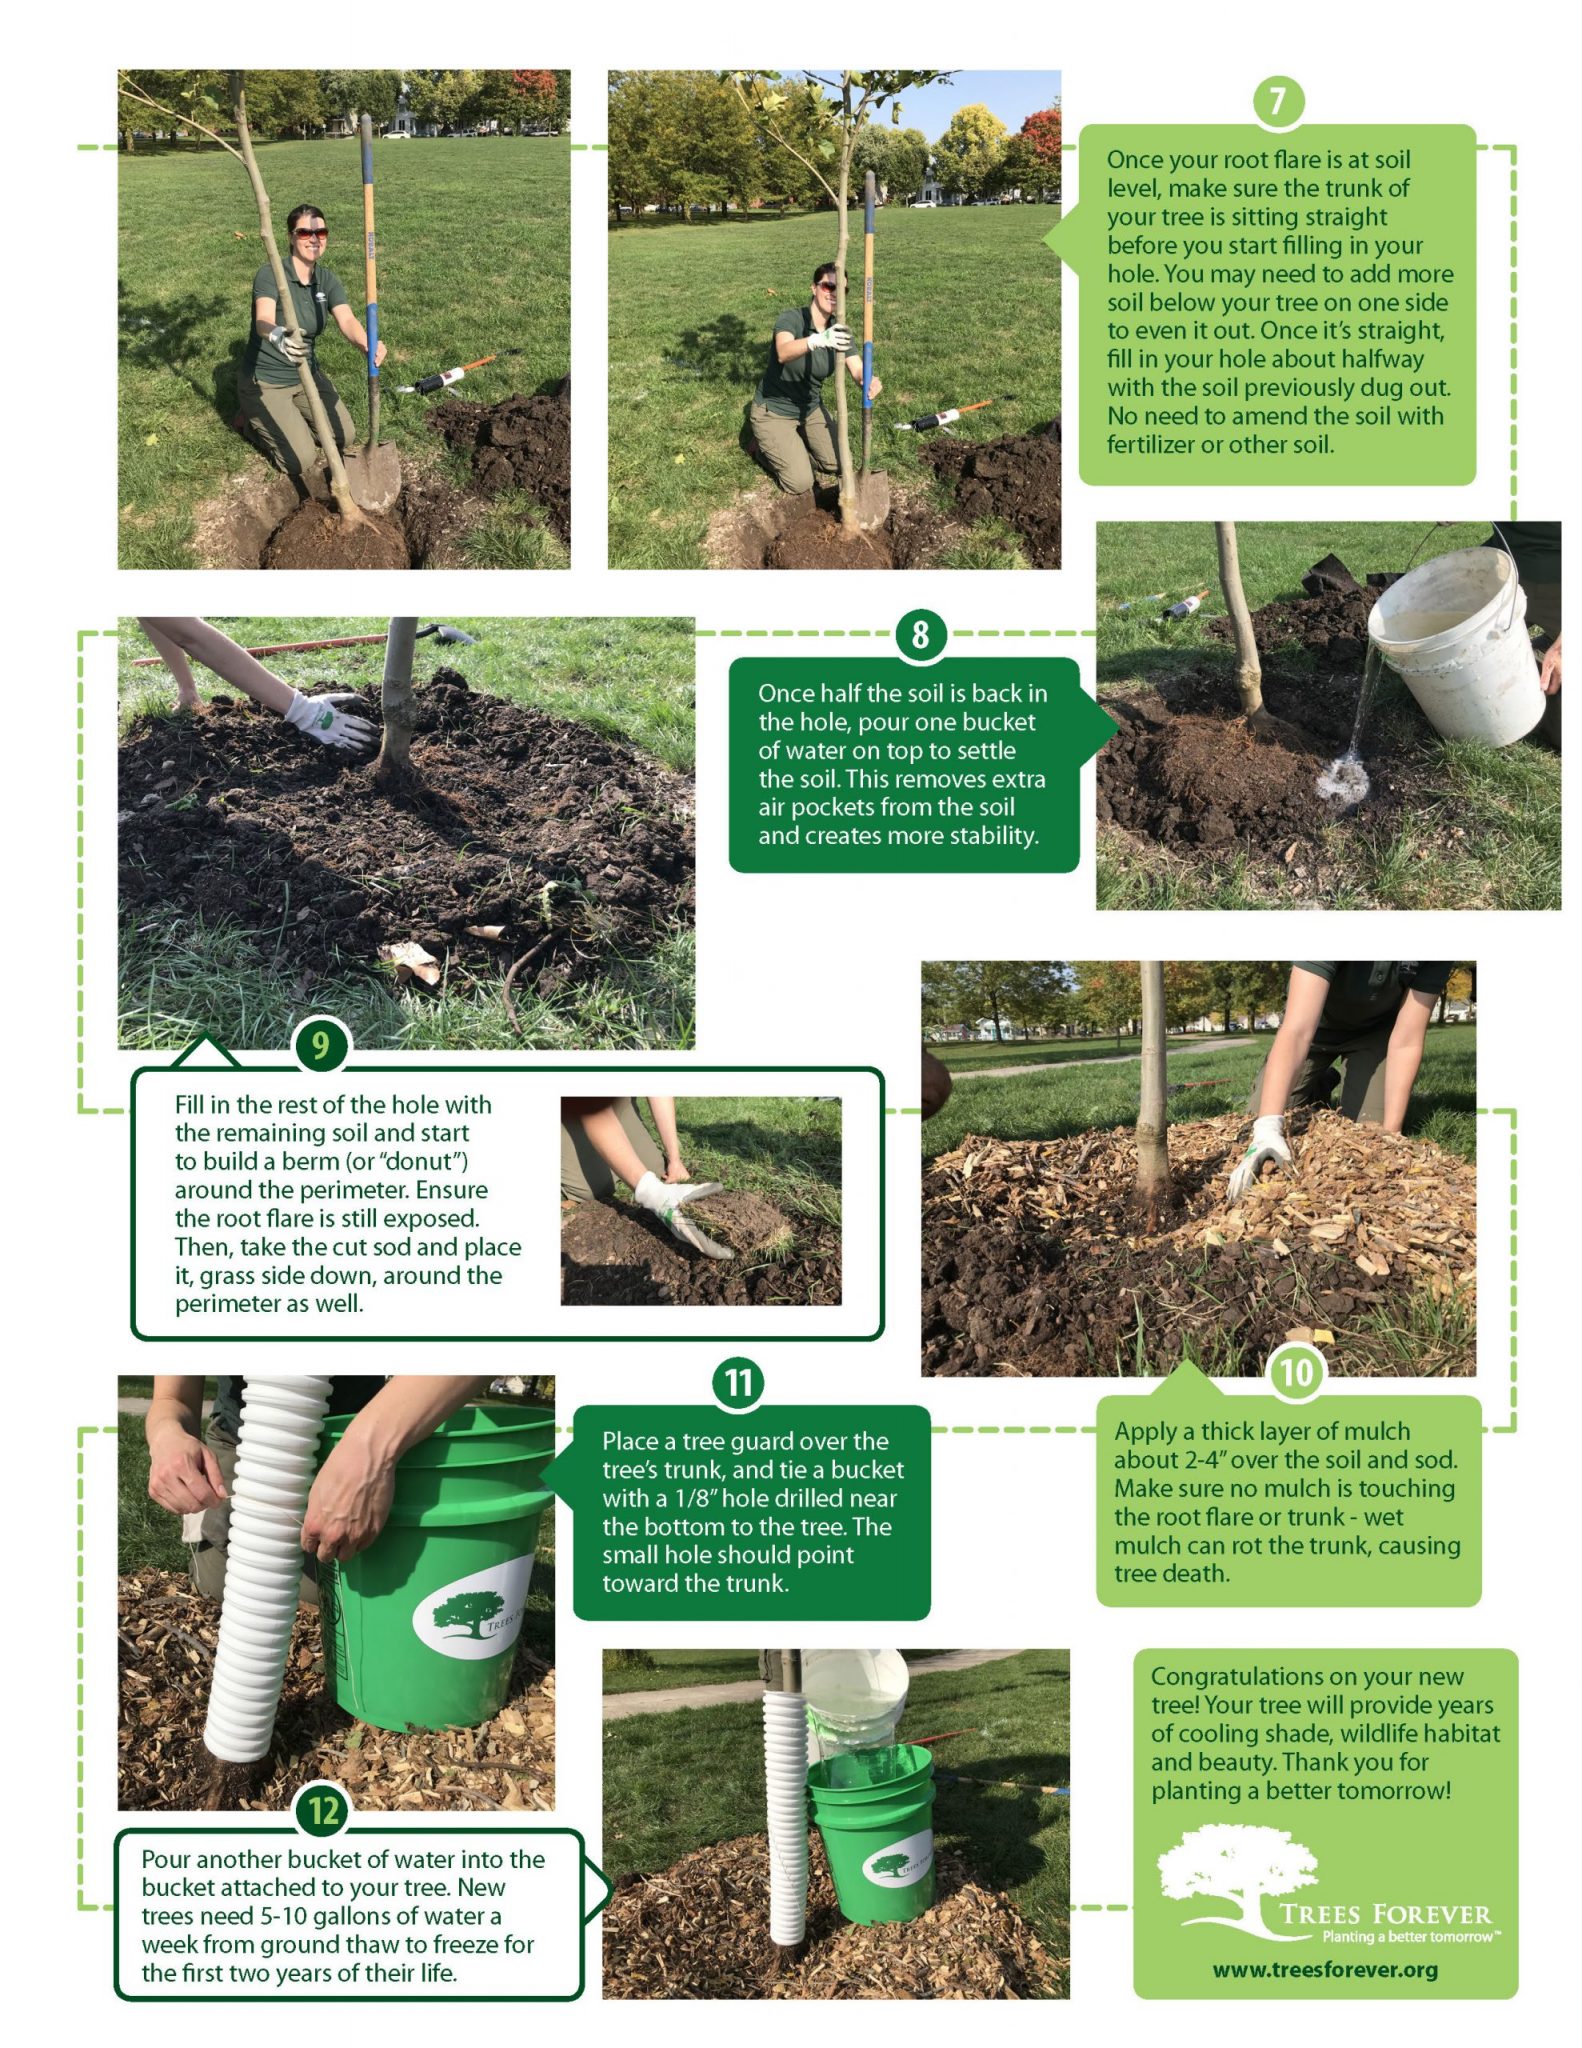
Follow along using this handy flow chart from Trees Forever.
So you have a new tree. Awesome! Before you do anything, always call Iowa One (811) before planting. Then…
 1. Determine where you’ll plant your tree and dig a wide circle, much wider than your tree container. Start by removing the top layer of grass in chunks before digging down.
2. Dig a hole no deeper than 1 foot.
3. Remove your tree from its container. If it’s in a cloth grow bag, use a box knife to cut the bag free and then pull the roots away from the bag.
4. Prep your tree for planting by finding the root flare. The root flare is where the base of the trunk flares into the roots. Using a small saw, carefully remove layers of soil, stopping before you get close to the trunk, until you find the first root the size of a finger. Roots smaller than this are NOT the root flare and can be removed. Remove soil from around the entire tree so root flare is exposed on all sides.
5. To prevent the roots from circling below the tree, slice 3 perpendicular cuts around the tree base.
6. Lower the tree into the hole to check for correct depth. The tree’s root flare should sit at ground level, with the first root no more than an inch below ground. Check to see if the root flare is at ground level by placing your shovel across the hole (the bottom of the shovel handle represents the soil line). If the first root sits above the shovel line, remove the tree from the hole and dig out additional soil. If the first root sits below the shovel line, remove the tree and add additional soil. If the tree is heavy, you can use two shovels to measure the correct depth by measuring the height of the prepared tree base with another shovel (marking the height with your fingers), placing the shovel vertically in the hole, and comparing it to the shovel laying across the hole to see estimated depth.

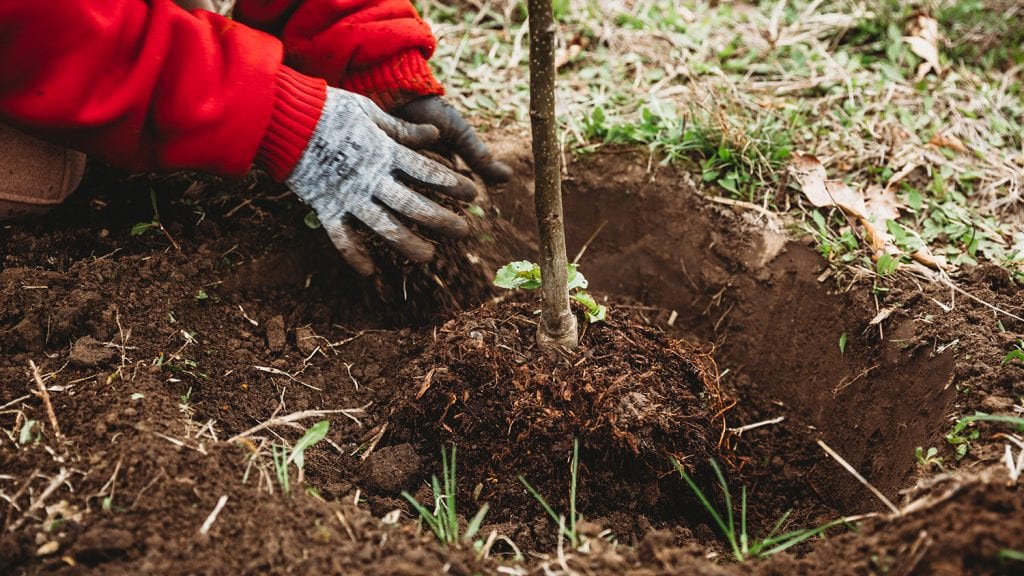
7. Once your root flare is at soil level, make sure the trunk of your tree is sitting straight before you start filling in your hole. You may need to add more soil below your tree on one side to even it out. Once it’s straight, fill in your hole about halfway with the soil previously dug out. No need to amend the soil with fertilizer or other soil.
8. Once half the soil is back in the hole, pour one bucket of water on top to settle the soil. This removes extra air pockets from the soil and creates more stability.
9. Fill in the rest of the hole with the remaining soil and start to build a berm (or “donut”) around the perimeter. Ensure the root flare is still exposed. Then, take the cut sod and place it, grass side down, around the perimeter as well.
10. Apply a thick layer of mulch about 2-4” over the soil and sod. Make sure no mulch is touching the root flare or trunk – wet mulch can rot the trunk, causing tree death.
11. Place a tree guard over the tree’s trunk, and tie a bucket with a 1/8” hole drilled near the bottom to the tree. The small hole should point toward the trunk.
12. Pour another bucket of water into the bucket attached to your tree. New trees need 5-10 gallons of water a week from ground thaw to freeze for the first two years of their life.
Congratulations on your new tree! Your tree will provide years of cooling shade, wildlife habitat and beauty. Thank you for planting a better tomorrow!
Trees Forever’s mission is to plant and care for trees and the environment by empowering people, building community, and promoting stewardship through cutting-edge programs and innovative practices. Their trained and experienced staff have assisted community leaders and landowners across Iowa and Illinois with thousands of planting projects. Each year, on average, they work with and engage more than 7000 volunteers who give generously of their time and talents. To date, they have helped plant more than 3 million trees and shrubs throughout Iowa and Illinois.
For additional resources & information about Trees Forever, visit www.treesforever.org

